
9 Easy Steps for Packing a Bike to Move
Bargain Storage
November 25th, 2024

Most people don’t even bother wiping the mud off their bike before they have movers roll it up and onto the truck. But if your bike is not in a box, it will either end up lying flat on top of everything or wedged in the middle somewhere. During the move, your bike can get damaged this way and it can also cause damage to the items around it. Not to worry though because we have put together nine easy steps to packing a bike to move.
Step 1: Shift to the lowest gear
How do you pack a bike? You have to start on the lowest gear. This pulls the rear derailleur, aka the most expensive and delicate component on your bike, closer to the rear wheel. It also adds an extra ounce of protection against potential impact damage.
Step 2: Remove the pedals
With a wrench, grab the end of the pedal and twist. You will have to turn the pedals in opposite directions, left pedal clockwise, and right pedal counter-clockwise. Please take note that removing some pedals requires an Allen (hex) wrench, with the hole on the inner end of the pedal closest to the bicycle. Here’s a YouTube video about it to help you out: https://www.youtube.com/watch?v=j2pNdTWLE94
Make sure to put your pedals in a small box or bag and label them appropriately. One thing to note is that over time, pedals can sometimes become stuck and difficult to remove. A lubricant like WD-40 can help in this instance.Each pedal is marked with an “L” or an “R” which will be a great help when you put them back on your bike after the move.
Step 3: Padding
The use of bubblewrap is essential for the padding step to make sure to wrap the most sensitive parts of your bike frame:
- Handlebars
- Pedal cranks
- Rear derailleur
It’s a good idea to secure the pedal cranks to the bike frame to keep the chain drive from moving and shifting. Do this before wrapping the derailleur!The finished product should be similar to this photo:
Step 4: Handlebar Removal
With an Allen (hex) wrench, remove the four bolts holding the faceplate in place.Take care once the bolts are removed so the handlebars don’t fall and do bad things to the brake and shifting cable mechanisms. Immediately screw the bolts back in to put the faceplate back on. Since they are attached to the ends of your handlebars, try not to strain the brake and shift cables while you’re doing this! Once done, secure the handlebars to the right side of the frame using something to fasten it.
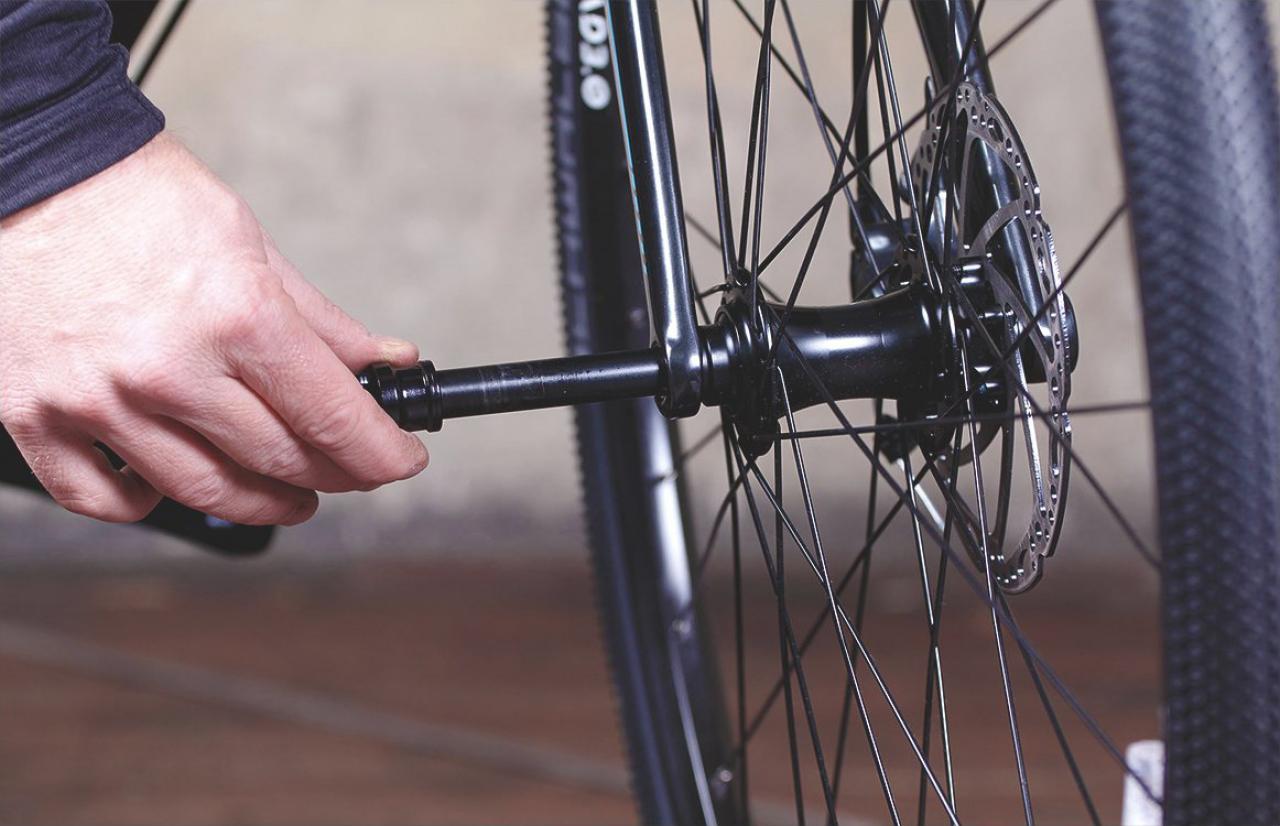
Step 5: Remove the Front Wheel
Rim brake (left) and disc brake (right) – cyclingnews.com
If you have rim brakes, you’ll need to loosen them first to allow the wheel to come off. Disc brakes need no attention for now.To get the wheel off, you need to flip the little lever on the left side of the wheel hub and loosen the axle until the wheel comes free. Keep unscrewing the axle until the part on the right side comes off.Careful: there are two conical springs on the axle, which look exactly how they sound like. Don’t lose them! Simply slide the axle out of the wheel, put the spring and the end piece back on the axel, and put the whole thing into the cardboard parts box with your pedals (and other small parts).
Step 6: The Front Fork should be Wrapped
It’s a good idea to have some cardboard ready when you take off the front wheel. This will give you surface to set the ends of your front fork on the ground and avoid damage to it. Bubble wrap or a foam pipe cover cut to size works well as fork padding.
Step 7: Pad the Disc Brake (if present on your bike)
When your bike has disc brakes, you will need to pad the brake on the left fork. Padding the wheel hubs and elements of a chain drive can be tricky if not a bit difficult. A professional would take the time to do this though so if you care about your bike, it’s well worth your time and effort.Also, taping pieces of extra cardboard to the inside of the bike box where these parts sit lends an extra layer of protection. Go even further by putting extra bubble wrap or foam underneath these extra pieces of cardboard.
When you got your bike box, often times the bike store will include a T-shaped device with the packing materials. This specialized piece will protect the ends of your forks and hold them in place to prevent damaged from pressure or impact. Other pieces may attach to the wheel hubs, not only protecting them but also providing an extra surface area to keep the box from getting crushed against your bicycle.
Step 8: Time to Place your Bike in the Box
The front fork should be placed 180 degrees so the neck (where the handlebars attach) is facing backwards. Then carefully slide the front wheel in on the left side. This part is important because the chainrings are on the right side and will damage the wheel.Make sure to lower the seat so that it may be padded and still allows you to close the box entirely. The seat will help keep the box from getting crushed on top while in transport.
Step 9: Tape the Box
Sounds simple but make sure to tape all corners of your box in addition to the top and bottom edges. Also a good idea to reinforce the carry holes on the side of the box with tape to make them stronger and less chance of tearing during the move.
Packing a bike isn’t as complicated as it seems, it just takes a little getting used to. And if you’re finding yourself too frightened to do all of the above, ask your movers if they can help (they probably have done this before). But if you’re doing this alone and/or for the first time, don’t freak out! Once you get the hang of it, you’ll never forget. It’s kind of like riding a…
Originally posted in Hire a Helper
Storage Tips & Local News | Bargain Storage Blog